
Moving your WordPress site to a new host sounds intimidating, but it doesn’t have to break your rankings, your uptime, or your sanity. Whether you’re upgrading to managed WordPress hosting, chasing better performance, or simply unhappy with your current provider, knowing how to migrate WordPress to a new host correctly is the difference between a smooth transition and days of downtime.
This guide walks you through the practical steps of a WordPress migration, the mistakes that trip up most site owners, and the best practices that keep your site — and your SEO — intact.
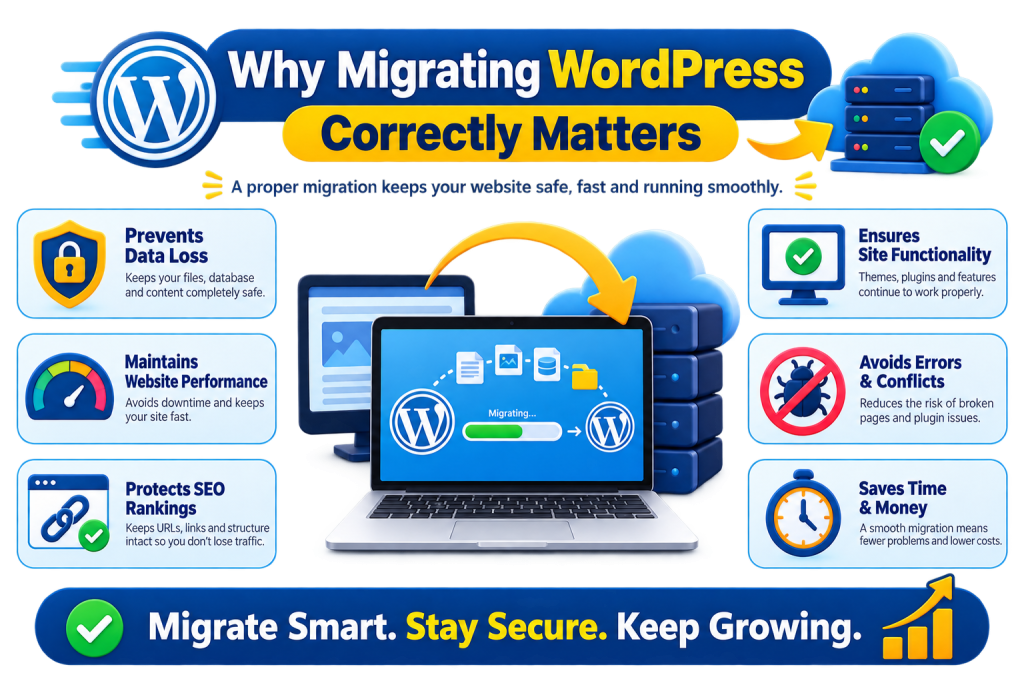
Why Migrating WordPress Correctly Matters
A WordPress migration touches everything: your database, your files, your DNS records, and often your email. Get any part of it wrong, and you risk broken links, missing images, lost orders (if you run WooCommerce), or a site that simply won’t load.
For UAE businesses and agencies managing client sites, downtime isn’t just inconvenient — it can mean lost sales, missed leads, and a dent in customer trust. A well-planned migration protects your search rankings, keeps your site accessible during the switch, and gives you a clean start on your new host.
What You Need Before You Start
Before touching anything, gather the essentials:
- Access to your current host (cPanel, FTP/SFTP, or hosting dashboard)
- Access to your new host (login details and server information)
- WordPress admin login
- A full backup of your files and database
- Domain registrar access (in case DNS changes are needed)
If your new host offers managed WordPress hosting, many of these steps may be simplified or handled for you — worth checking before you begin.
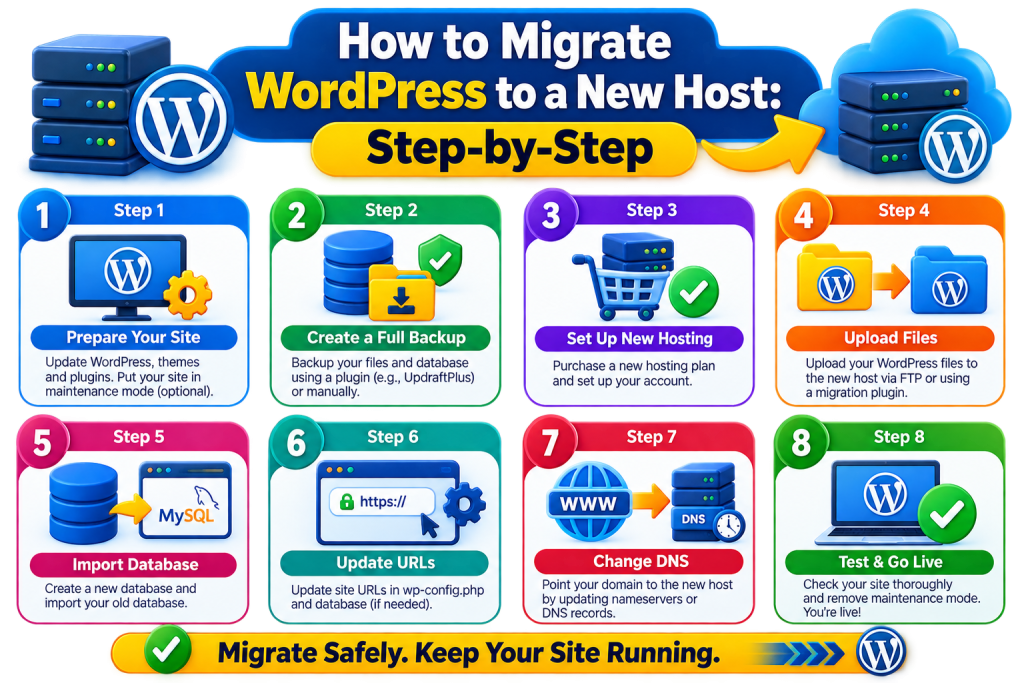
How to Migrate WordPress to a New Host: Step-by-Step
1. Back Up Your Entire Site
Never migrate without a full backup. This includes:
- All WordPress files (themes, plugins, uploads, core files)
- Your MySQL database (posts, pages, settings, user data)
You can do this manually via FTP and phpMyAdmin, or use a reliable backup plugin to export everything into a single downloadable package. If you’re unfamiliar with backup strategy, CreativeON’s WordPress backup guide covers this in more depth.
2. Choose Your Migration Method
There are three common approaches:
- Migration plugins — automate file transfer and database export/import, and can simplify the process for smaller websites
- Manual migration (FTP + phpMyAdmin) — gives you more control, but requires technical comfort
- Host-assisted migration — often the easiest option when your new provider offers it
The right choice depends on your site’s size, complexity, and how much control you want over the process.
3. Set Up Your New Hosting Environment
Before importing anything, prepare your new host. Consider a managed WordPress hosting plan if you want the server-side details handled for you:
- Create the hosting account or WordPress instance
- Note the new server’s IP address or temporary URL
- Install WordPress if it isn’t pre-installed
- Match your PHP version and any required server settings to avoid compatibility issues
4. Transfer Your WordPress Files and Database
Upload your WordPress files to the new server via FTP/SFTP, then import your database using phpMyAdmin or your migration plugin’s built-in tool.
For frequently updated websites, minimize changes during this final transfer. WooCommerce stores, membership sites, forums, and busy blogs can receive new orders, registrations, comments, or other database changes while the migration is in progress — and anything written after you’ve copied the database won’t carry over. For these sites, plan a short content freeze around the transfer, or use a migration method that keeps the database synchronized until the switch is complete.
5. Configure and Verify WordPress
After transferring the files and importing the database, update wp-config.php with the database name, username, password, and host details supplied by your new provider. Then confirm:
- WordPress can connect to the database without errors
- The wp-content directory, uploads, plugins, and themes transferred correctly
- File permissions are set correctly where applicable
- The PHP version on the new server matches what your site needs
This step catches configuration problems before you ever test the front end.
6. Test the Site Before Going Live
Most hosts let you preview your site on a temporary URL or by editing your local hosts file, so you can test everything before DNS changes take effect. Check:
- Homepage and key landing pages
- The WordPress Address (URL) and Site Address (URL) settings, especially if you’re keeping the same domain and HTTPS version
- Contact forms
- WooCommerce checkout (if applicable)
- Images and media
- Plugin and theme functionality
This step catches problems while your live site is still safely pointed at the old host.
7. Update DNS to Point to the New Host
Once you’ve confirmed the new site works correctly, update your domain’s DNS records (usually the A record) to point to your new host’s server. DNS changes can begin taking effect within minutes, but some visitors or networks may keep resolving the old server until cached records expire — the actual timing depends on DNS caching and TTL values, not a fixed window.
Keep the same domain and URL structure whenever possible. A hosting migration doesn’t require changing your WordPress URLs, permalink structure, or domain. Changing URLs during the same migration adds unnecessary redirects and can introduce broken links or indexing problems — if you also want to restructure URLs, treat that as a separate project.
8. Verify and Clean Up
Once DNS has propagated, work through a quick post-migration checklist:
- Homepage and important landing pages
- Posts and pages
- Images and media
- WordPress login
- Contact forms
- WooCommerce checkout
- SSL/HTTPS
- Permalinks
- Plugins and themes
- Analytics and tracking
Verify SSL specifically: confirm the HTTPS version loads correctly, the certificate is valid, and HTTP redirects to HTTPS where expected — pay particular attention to login, checkout, and contact form pages. See CreativeON’s SSL for WordPress guide if certificates need reissuing.
Check permalinks too. Open a few posts and pages; if any return 404 errors, go to Settings → Permalinks in WordPress and save the existing structure to refresh the rewrite rules.
Only cancel or downgrade your old hosting plan after everything above is confirmed stable.
Best Practices for a Smooth Migration
- Back up before starting — always have a fallback if something goes wrong
- Test the new site before DNS changes, using a temporary URL or staging environment — CreativeON’s WordPress staging environment guide explains how this works
- Keep the old host active temporarily for at least a few days after migration as a safety net
- Reduce content activity during the migration window, especially for WooCommerce stores or busy sites, to avoid database mismatches
- Keep the same domain and URL structure unless you have a specific reason to change it
- Check SSL, permalinks, forms, and media after DNS changes take effect
- Review your caching settings after migration, since cached versions of your old site can cause confusing display issues — see CreativeON’s WordPress caching guide for details
Common Migration Mistakes to Avoid
- Skipping the backup step — always have a fallback if something goes wrong
- Forgetting to update wp-config.php with new database credentials
- Not testing before DNS propagation, which means problems go live immediately
- Ignoring SSL certificates, leading to browser security warnings after the move
- Ripping the old hosting down too soon, before confirming the new site is fully stable
- Overlooking email hosting, which is sometimes separate from web hosting and needs its own migration plan
- Changing URLs unnecessarily during the same migration, which adds risk without solving the problem you set out to fix