How to Make a WordPress Page Private
Sometimes, you may want to publish a WordPress page without making it accessible to everyone. For example, you might need a page for internal company information, a private project update, or content intended for a selected group of visitors. WordPress provides built-in visibility settings that allow you to control who can access individual pages. You […]
Sometimes, you may want to publish a WordPress page without making it accessible to everyone. For example, you might need a page for internal company information, a private project update, or content intended for a selected group of visitors.
WordPress provides built-in visibility settings that allow you to control who can access individual pages. You can make a page private so that only authorized WordPress users can view it, or password-protect it so visitors can access the content by entering a password.
In this guide, you’ll learn how to make a WordPress page private, password-protect a page, and choose the right visibility setting for your requirements.
Understanding WordPress Page Visibility
WordPress provides three main visibility options when publishing or editing a page:
- Public: Anyone can visit and view the published page.
- Private: Only logged-in users with the appropriate WordPress permissions can view the page.
- Password Protected: Visitors must enter the correct password to access the page content.
These settings are available directly in the WordPress editor, so you do not need an additional plugin to restrict access to a standard WordPress page.
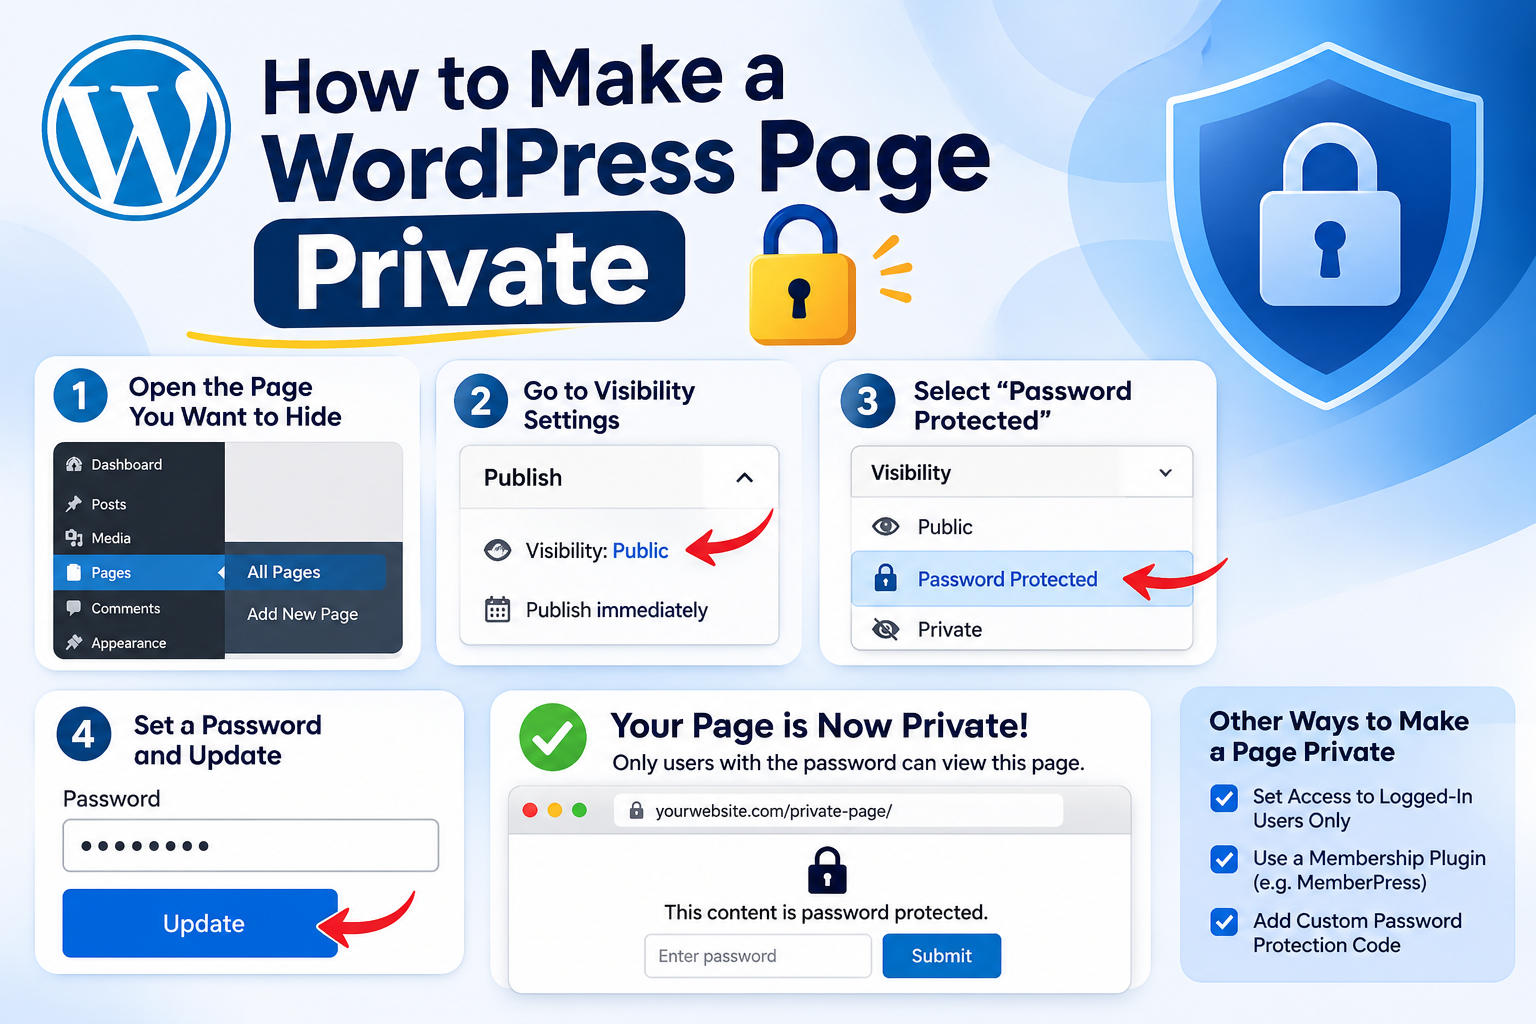
How to Make a WordPress Page Private
You can make an existing WordPress page private directly from your dashboard. The same process applies when creating a new page.
Step 1: Open the WordPress Page Editor
- Log in to your WordPress dashboard.
- Navigate to Pages → All Pages.
- Find the page you want to make private.
- Click Edit to open the page editor.
Step 2: Open the Visibility Settings
If you are using the WordPress Block Editor:
- Click the Settings icon in the top-right corner if the settings sidebar is hidden.
- Select the Page tab in the sidebar.
- Locate the Status or Visibility setting.
- Click the current visibility option, usually displayed as Public.
Step 3: Select Private Visibility
WordPress displays the available visibility options.
- Select Private.
- Confirm your selection if a confirmation message appears.
- Check that the visibility setting now displays Private.
Step 4: Save Your Changes
Click Update to save the changes to an existing page.
For a newly created page, click Publish and confirm the publishing action if prompted.
Your page is now privately published. Visitors who are not logged in with an authorized WordPress account will not be able to view its content.
Important: By default, WordPress private pages are accessible to users with Administrator or Editor capabilities. Ordinary Subscribers and other lower-permission users cannot view them.
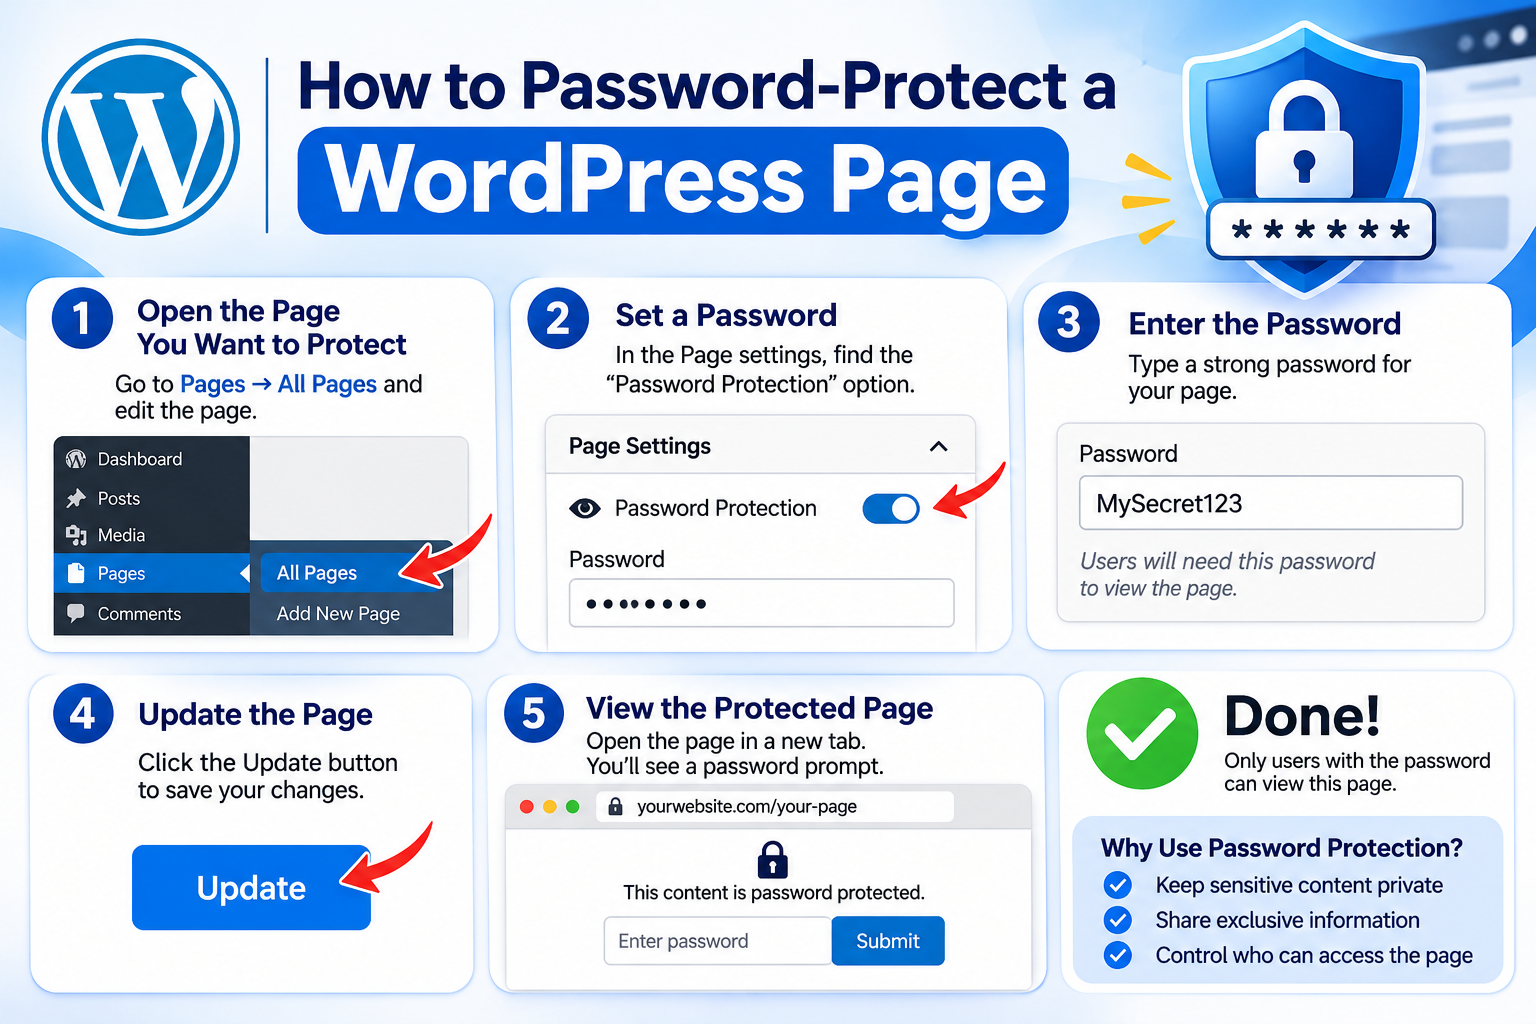
How to Password-Protect a WordPress Page
If you want selected visitors to access a page without creating WordPress accounts for them, password protection is usually a better option.
Follow these steps:
- Navigate to Pages → All Pages.
- Open the page you want to protect.
- Access the page settings and locate Visibility.
- Click the current visibility option.
- Select Password Protected.
- Enter a password of your choice.
- Confirm the setting and click Update.
When visitors open the page, WordPress displays a password field. They must enter the correct password before the protected page content becomes visible.
Choose a strong, unique password and share it only with the intended visitors.
Private Page vs Password-Protected Page
Although both options restrict public access, they serve different purposes.
| Feature | Private Page | Password-Protected Page |
| Public visitors | Cannot view | Must enter a password |
| WordPress login | Required | Not required |
| Access control | WordPress user permissions | Shared password |
| Best suited for | Internal content | Selected visitors |
| Additional plugin | Not required | Not required |
Choose Private when content is intended for authorized website administrators or editors. Choose Password Protected when you want clients, customers, or other visitors to access a page without creating individual WordPress accounts.
How to Make a WordPress Page Private Using Classic Editor
If your website uses the WordPress Classic Editor, you can change page visibility through the Publish panel.
Follow these steps:
- Go to Pages → All Pages.
- Open the page you want to edit.
- Find the Publish panel.
- Locate Visibility: Public.
- Click Edit beside the visibility setting.
- Select Private.
- Click OK and then Update.
WordPress will save the page as private, using the same access permissions as pages created through the Block Editor.
Best Practices When Making WordPress Pages Private
Before restricting access to a WordPress page, consider these recommendations:
- Choose the correct visibility setting: Use Private for internal content and Password Protected for sharing pages with external visitors.
- Test page accessibility: Open the page in a logged-out browser or private browsing window to check that public visitors cannot view its content.
- Review user permissions: Administrators and Editors can access private pages. Avoid assigning these roles unnecessarily.
- Use strong passwords: If you choose password protection, avoid predictable passwords and do not reuse passwords from other accounts.
- Protect uploaded files separately: Images and documents uploaded to the WordPress Media Library may remain accessible through their direct URLs, even when used on a private or password-protected page.
- Avoid storing highly sensitive information: Standard WordPress page visibility settings should not be treated as a complete document-security or confidential-data management solution.
Common Mistakes to Avoid
When making a WordPress page private, avoid these common mistakes:
- Confusing Private with Password Protected
A private page requires an authorized WordPress login, while a password-protected page requires visitors to enter a shared password. Choose the option that matches your access requirements.
- Assuming Subscribers Can View Private Pages
By default, WordPress does not allow ordinary Subscribers to access private pages. The required capabilities are generally available to Administrators and Editors.
- Confusing Draft with Private
A draft page is unpublished content that is still being prepared. A private page is published but restricted to authorized WordPress users.
- Forgetting to Update the Page
Changing the visibility setting does not automatically save all changes. Always click Update or complete the Publish process.
- Assuming Uploaded Files Are Automatically Protected
Making a page private does not necessarily restrict direct access to images, PDFs, or other uploaded media. Protect sensitive files separately.