How to Manage WordPress Plugins With WP-CLI
Managing WordPress plugins from the dashboard is straightforward, but it can become time-consuming when you manage multiple websites or need to perform repetitive maintenance tasks. WP-CLI lets you manage WordPress plugins directly from the command line, without opening the WordPress dashboard. With WP-CLI, you can list, install, activate, deactivate, update, uninstall, delete, and verify WordPress […]
Managing WordPress plugins from the dashboard is straightforward, but it can become time-consuming when you manage multiple websites or need to perform repetitive maintenance tasks. WP-CLI lets you manage WordPress plugins directly from the command line, without opening the WordPress dashboard.
With WP-CLI, you can list, install, activate, deactivate, update, uninstall, delete, and verify WordPress plugins. This makes it useful for WordPress administrators, developers, agencies, and hosting users who have SSH access to their server.
This guide focuses specifically on WordPress plugin management with WP-CLI, including the commands you are most likely to use during routine maintenance and troubleshooting.
Before Managing Plugins With WP-CLI
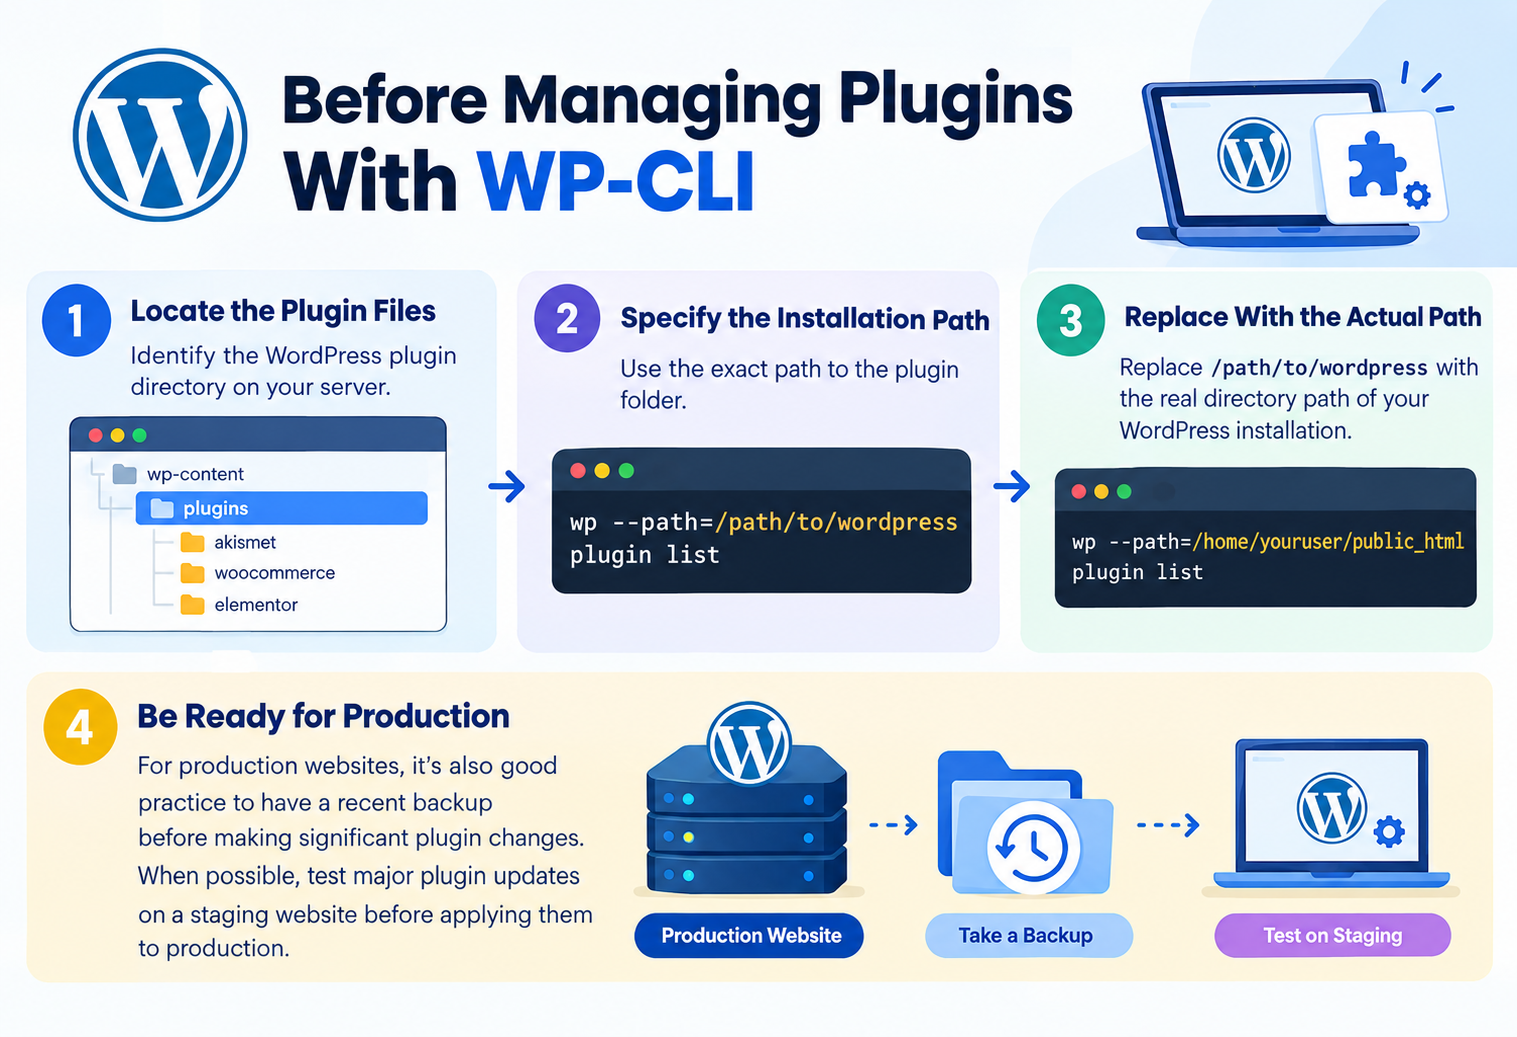
Before running plugin commands on a live WordPress website, confirm that you are working with the correct installation.
If you are already inside the WordPress installation directory, start with:
wp plugin list
If the WordPress files are located elsewhere, specify the installation path:
wp –path=/path/to/wordpress plugin list
Replace /path/to/wordpress with the actual directory containing your WordPress installation.
For production websites, it is also good practice to have a recent backup before making significant plugin changes. When possible, test major plugin updates on a staging website before applying them to production.
1. List Installed WordPress Plugins
Before installing, updating, or troubleshooting a plugin, you can see which plugins are installed with:
wp plugin list
The command displays useful information such as:
- Plugin name
- Activation status
- Installed version
- Available update
- Auto-update status
You can list only active plugins:
wp plugin list –status=active
Or inactive plugins:
wp plugin list –status=inactive
For automation or scripting, WP-CLI can also return plugin information in formats such as JSON:
wp plugin list –format=json
This makes wp plugin list a useful starting point for routine WordPress plugin management.
2. Install a WordPress Plugin With WP-CLI
You can install a plugin from the WordPress.org plugin directory using its plugin slug.
For example:
wp plugin install wordpress-seo
The command downloads and installs the plugin, but does not activate it.
If you want to install and activate the plugin in one step, use:
wp plugin install wordpress-seo –activate
You can also install a plugin from a local ZIP file:
wp plugin install /home/user/plugin.zip
This can be useful when installing a premium or custom plugin that you have already uploaded to the server.
3. Activate a WordPress Plugin
If a plugin is installed but inactive, activate it with:
wp plugin activate plugin-name
For example:
wp plugin activate wordpress-seo
You can activate multiple plugins in one command:
wp plugin activate plugin-one plugin-two plugin-three
For WordPress Multisite, you can activate a plugin across the network with:
wp plugin activate plugin-name –network
Use network activation carefully because the change can affect multiple websites within the Multisite installation.
4. Deactivate a WordPress Plugin
To deactivate an active plugin:
wp plugin deactivate plugin-name
For example:
wp plugin deactivate wordpress-seo
You can also deactivate multiple plugins:
wp plugin deactivate plugin-one plugin-two
Deactivation can be particularly useful when troubleshooting a WordPress website.
For example, if a website starts producing errors after a plugin change, you can temporarily deactivate the suspected plugin and check whether the problem disappears.
Deactivation does not remove the plugin’s files.
5. Update WordPress Plugins With WP-CLI
Keeping plugins updated is an important part of WordPress maintenance.
To update a single plugin:
wp plugin update plugin-name
For example:
wp plugin update wordpress-seo
You can also update several selected plugins:
wp plugin update plugin-one plugin-two
To update all plugins with available updates:
wp plugin update –all
Preview Plugin Updates Before Applying Them
When managing a production website, you can use –dry-run to preview updates without actually applying them:
wp plugin update –all –dry-run
This can help you see which plugins would be updated before making changes to the website.
A practical workflow is:
wp plugin update –all –dry-run
Review the results, then run:
wp plugin update –all
For important production websites, testing updates on staging first is still recommended.
6. Check Plugin Status
If you need a quick overview of plugin status, WP-CLI provides:
wp plugin status
You can also check a particular plugin:
wp plugin status plugin-name
For example:
wp plugin status woocommerce
You can check whether a specific plugin is installed with:
wp plugin is-installed plugin-name
And whether it is active with:
wp plugin is-active plugin-name
These commands are particularly useful when troubleshooting or creating maintenance scripts.
7. Uninstall a WordPress Plugin
When you no longer need a plugin, you can uninstall it using:
wp plugin uninstall plugin-name
For example:
wp plugin uninstall plugin-name
Uninstalling is different from simply deactivating a plugin.
Deactivation disables the plugin but leaves it installed.
Uninstallation runs the plugin’s uninstall process and, by default, removes its files.
Some plugins may also have their own procedures for removing stored data, so check the plugin’s documentation before removing a plugin from a production website.
8. Delete a WordPress Plugin
WP-CLI also provides:
wp plugin delete plugin-name
It is important to understand how this differs from uninstalling.
| Command | Purpose |
| wp plugin deactivate | Disables the plugin but keeps it installed |
| wp plugin uninstall | Runs the plugin’s uninstall procedure and normally removes its files |
| wp plugin delete | Deletes the plugin files without running the normal uninstall procedure |
Because these commands have different effects, make sure you choose the appropriate one before removing a plugin.
For normal plugin removal, uninstalling is generally the more appropriate operation when you want the plugin’s uninstall process to run.
9. Verify WordPress Plugin Files
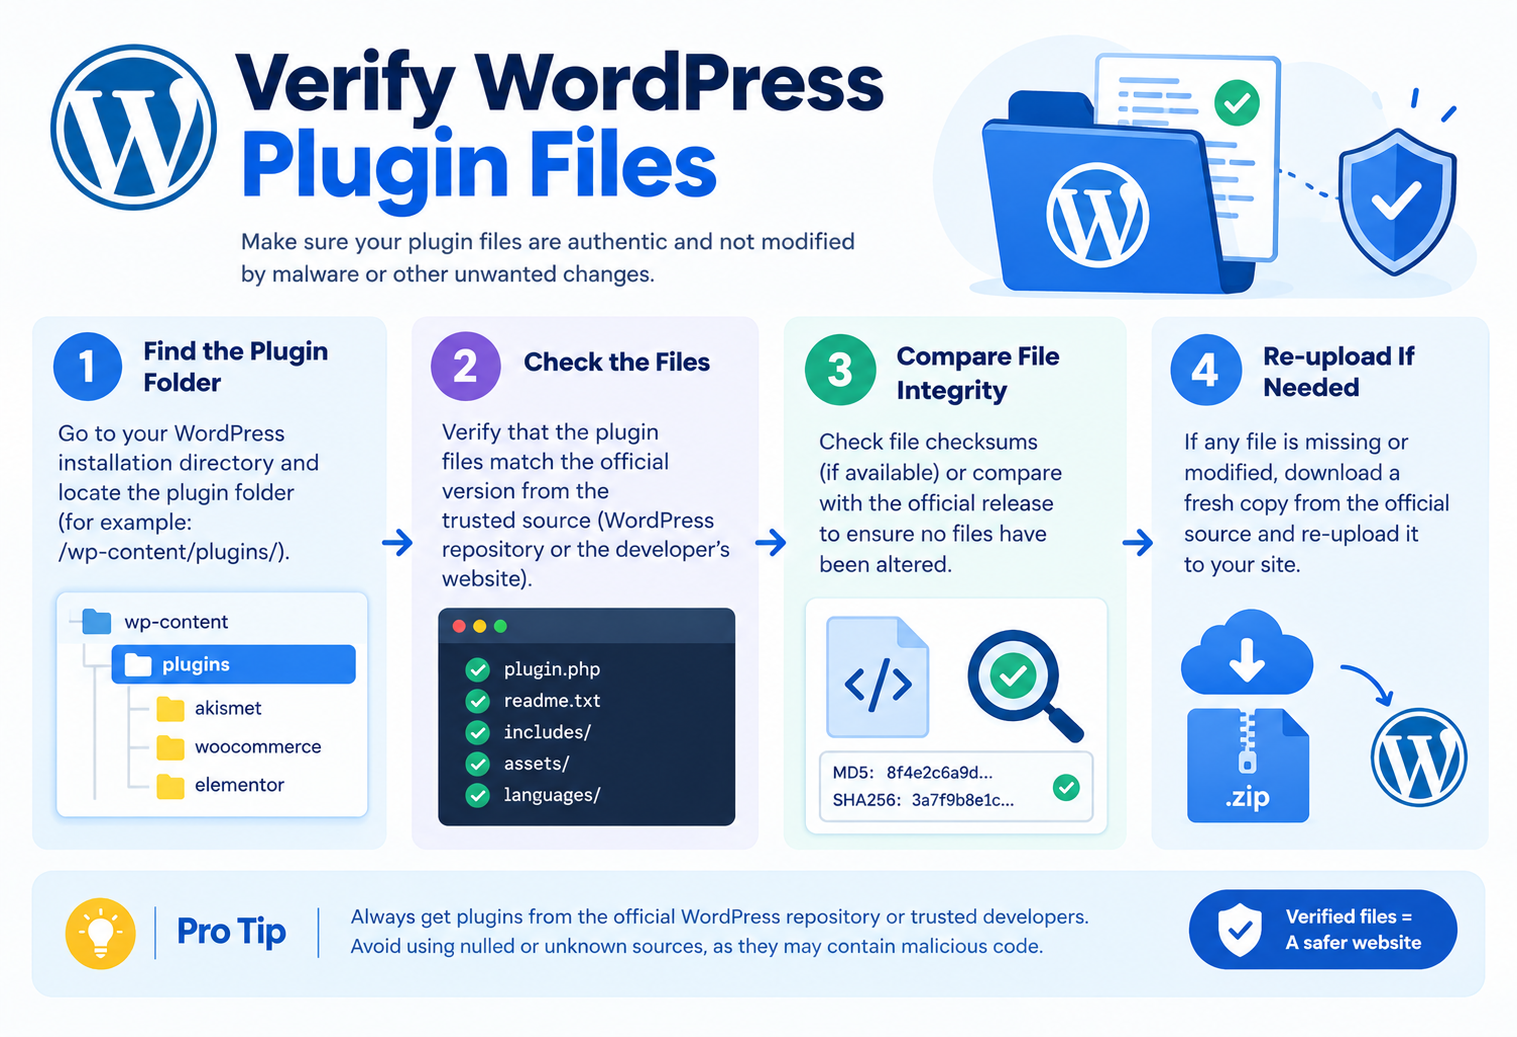
WP-CLI can compare plugin files against available WordPress.org checksums:
wp plugin verify-checksums
You can also target a specific plugin:
wp plugin verify-checksums plugin-name
Checksum verification can help identify unexpected changes to plugin files.
However, it is not a complete security audit. Checksum verification depends on available checksum data and is most directly useful for plugins with corresponding WordPress.org checksum information.
If you suspect a compromised website, additional security investigation may be necessary.
10. Managing Plugins on WordPress Multisite
WP-CLI can also manage plugins on WordPress Multisite installations.
For example, to activate a plugin across the network:
wp plugin activate plugin-name –network
You should confirm whether you need site-level or network-level activation before running the command.
WP-CLI also supports the global –url parameter for targeting a specific site in a Multisite environment.
Because network-level plugin changes can affect multiple websites, verify the target site and command before making changes.
Useful WP-CLI Plugin Commands
The following table provides a quick reference for the most commonly used commands:
| Task | WP-CLI command |
| List plugins | wp plugin list |
| List active plugins | wp plugin list –status=active |
| List inactive plugins | wp plugin list –status=inactive |
| Install plugin | wp plugin install plugin-name |
| Install and activate | wp plugin install plugin-name –activate |
| Activate plugin | wp plugin activate plugin-name |
| Deactivate plugin | wp plugin deactivate plugin-name |
| Update one plugin | wp plugin update plugin-name |
| Update selected plugins | wp plugin update plugin-one plugin-two |
| Preview updates | wp plugin update –all –dry-run |
| Update all plugins | wp plugin update –all |
| Check installation | wp plugin is-installed plugin-name |
| Check activation | wp plugin is-active plugin-name |
| Check status | wp plugin status plugin-name |
| Uninstall plugin | wp plugin uninstall plugin-name |
| Delete plugin files | wp plugin delete plugin-name |
| Verify plugin files | wp plugin verify-checksums |
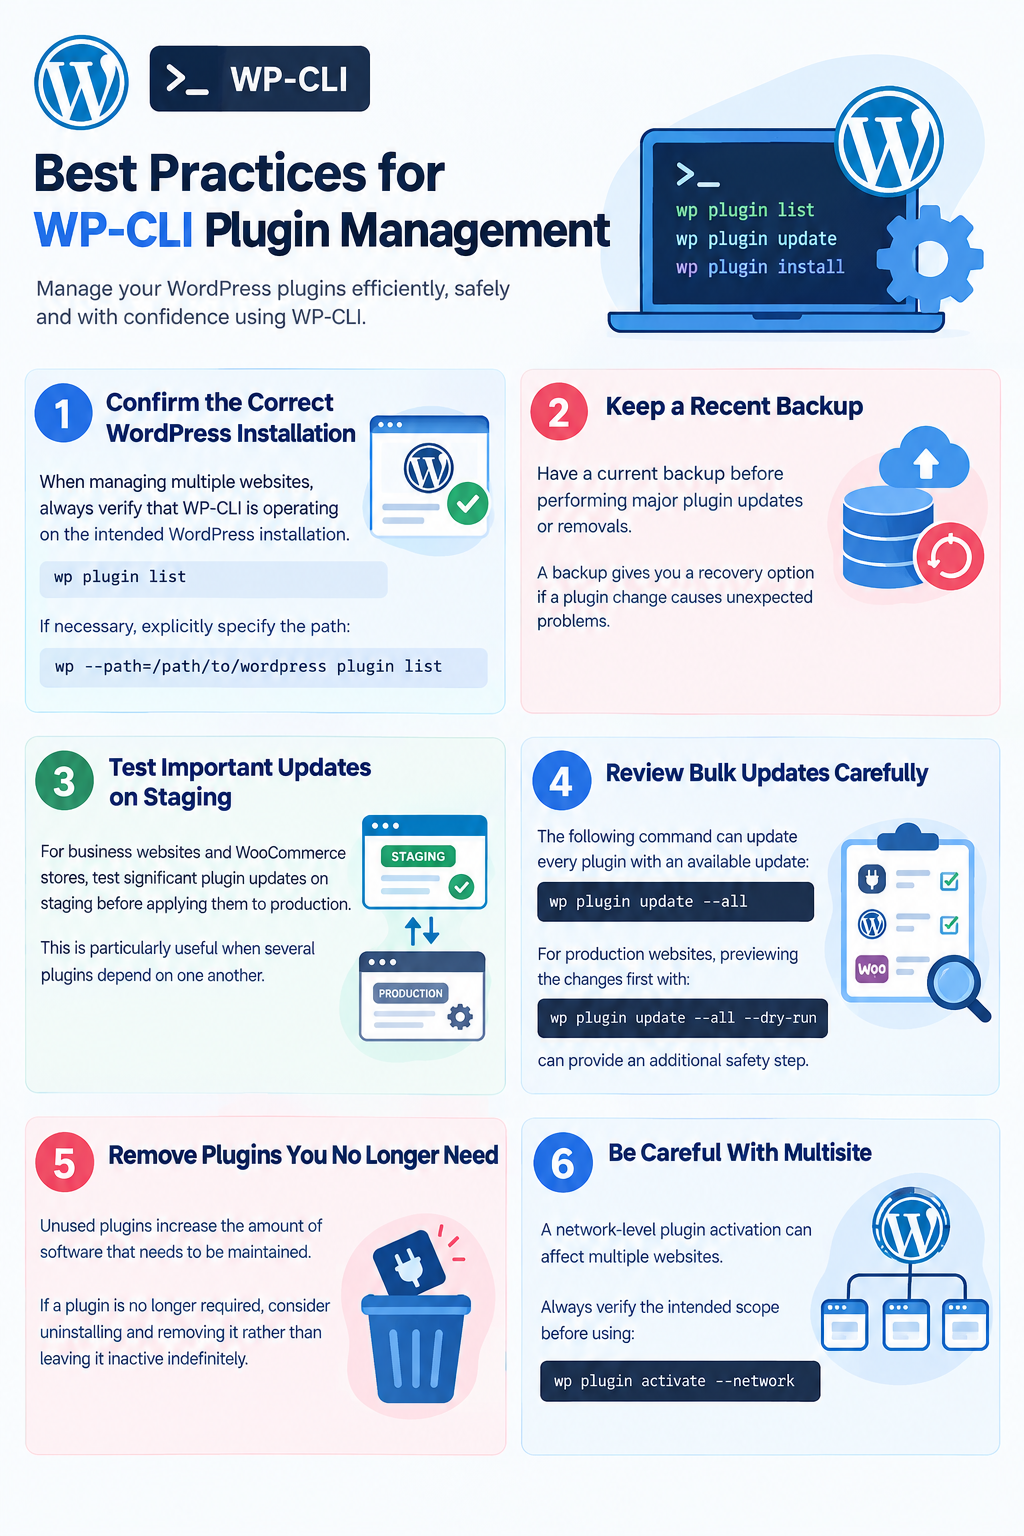
Best Practices for WP-CLI Plugin Management
WP-CLI makes plugin management much faster, but command-line operations can immediately change a live website. Follow these practices when managing production sites.
Confirm the Correct WordPress Installation
When managing multiple websites, always verify that WP-CLI is operating on the intended WordPress installation.
wp plugin list
If necessary, explicitly specify the path:
wp –path=/path/to/wordpress plugin list
Keep a Recent Backup
Have a current backup before performing major plugin updates or removals.
A backup gives you a recovery option if a plugin change causes unexpected problems.
Test Important Updates on Staging
For business websites and WooCommerce stores, test significant plugin updates on staging before applying them to production.
This is particularly useful when several plugins depend on one another.
Review Bulk Updates Carefully
The following command can update every plugin with an available update:
wp plugin update –all
For production websites, previewing the changes first with:
wp plugin update –all –dry-run
can provide an additional safety step.
Remove Plugins You No Longer Need
Unused plugins increase the amount of software that needs to be maintained.
If a plugin is no longer required, consider uninstalling and removing it rather than leaving it inactive indefinitely.
Be Careful With Multisite
A network-level plugin activation can affect multiple websites.
Always verify the intended scope before using:
wp plugin activate plugin-name –network
Common Mistakes When Managing Plugins With WP-CLI
Running Commands on the Wrong Website
This can happen when multiple WordPress installations exist on the same server.
Check the installation before making changes.
Updating All Plugins Without Testing
Bulk updates are convenient, but an incompatible plugin update can affect a production website.
Use staging and consider –dry-run before major updates.
Confusing Deactivation With Uninstallation
Deactivating a plugin does not remove it.
If you no longer need the plugin, determine whether you need to uninstall it as well.
Confusing Uninstall With Delete
wp plugin uninstall and wp plugin delete do not perform the same operation.
Understand the difference before removing plugin files.
Using Network Activation Without Checking the Scope
On WordPress Multisite, network activation can affect multiple sites.
Confirm that network activation is actually required.
Can WP-CLI Be Used Through SSH?
Yes. WP-CLI is commonly used from an SSH session when you have appropriate access to the WordPress hosting environment.
This allows administrators to manage plugins without logging into the WordPress dashboard.
WP-CLI also provides remote SSH functionality through its global –ssh parameter, although remote WP-CLI administration is a separate topic from the plugin commands covered in this guide.