How to Migrate Your Website to WordPress Hosting Safely
Moving a live website to a new host is one of those tasks that feels simple until something breaks. Broken links, missing images, downtime during business hours, or a site that suddenly returns a 500 error — these are the risks that make business owners nervous about switching hosts. If you’re planning to migrate your […]
Moving a live website to a new host is one of those tasks that feels simple until something breaks. Broken links, missing images, downtime during business hours, or a site that suddenly returns a 500 error — these are the risks that make business owners nervous about switching hosts.
If you’re planning to migrate your website to WordPress hosting safely, the good news is that the process is very manageable once you follow the right sequence. This guide walks through exactly how to do it, step by step, without losing data, rankings, or uptime.
This article focuses only on the migration process itself. If you’re still deciding which hosting plan to choose, CreativeON’s Managed WordPress Hosting guide covers that comparison in detail.
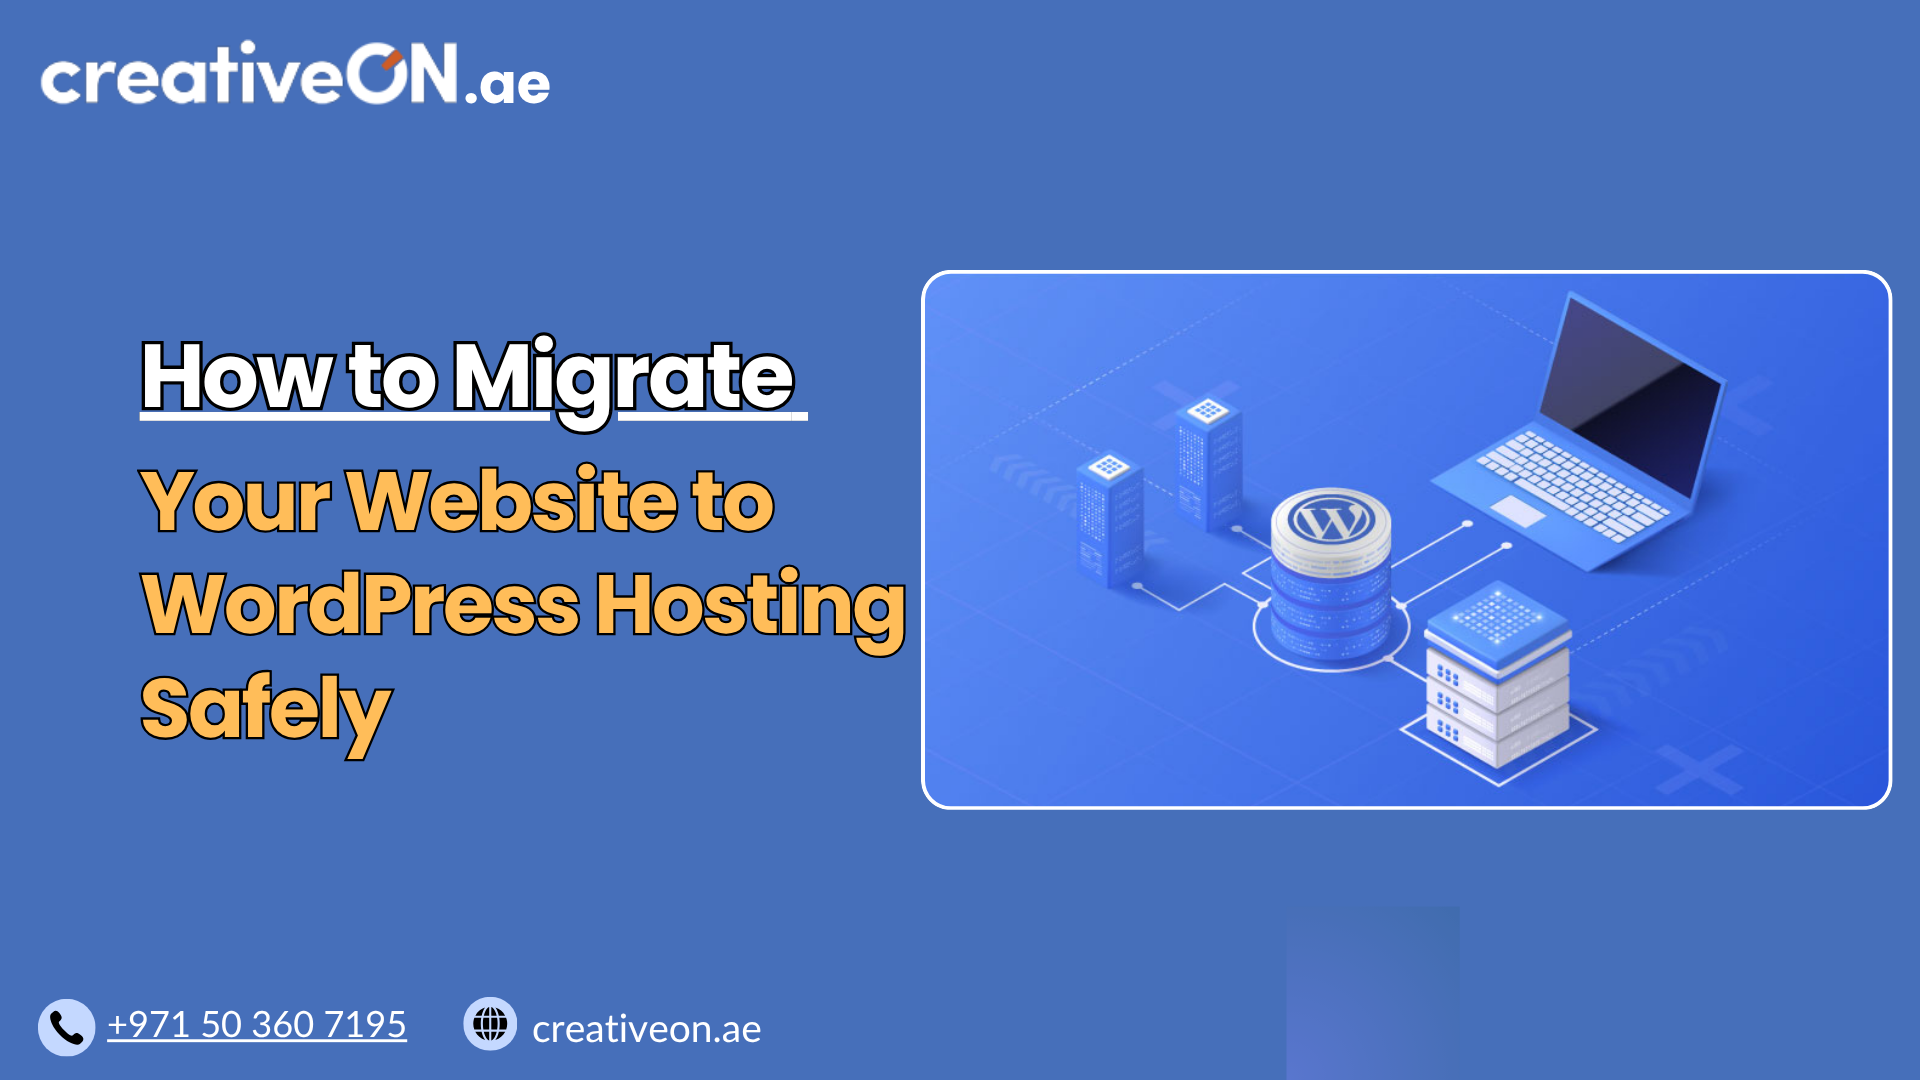
Why a Safe Migration Matters
A rushed migration can cause more damage than staying on a poor host. Common risks include:
- Downtime that affects customers and sales, especially for eCommerce sites
- Broken database connections if credentials or table prefixes aren’t updated correctly
- Lost SEO rankings if URLs, redirects, or sitemaps aren’t handled properly
- Missing media files when large uploads folders aren’t fully transferred
- Email disruption if MX records are changed at the same time as hosting
A safe migration isn’t about speed — it’s about sequencing. Get the order of operations right, and most of these risks disappear.
Pre-Migration Checklist
Before touching anything, prepare the groundwork. Skipping this step is the single biggest cause of migration problems.
- Take a full backup of your current site — files and database. Don’t rely on your old host’s backup system alone; download a copy locally or to cloud storage.
- Check PHP compatibility. Ensure your new hosting environment supports the same or newer PHP version required by your themes and plugins, along with a matching list of your current installed plugins.
- Export your DNS records from your current provider so you have a reference for MX, TXT, and CNAME entries.
- Check your SSL certificate status. If you’re using a free certificate tied to your old host, you’ll need a new one on the destination server.
- Make a list of email accounts hosted on the domain, since email migration often needs to happen separately from website migration.
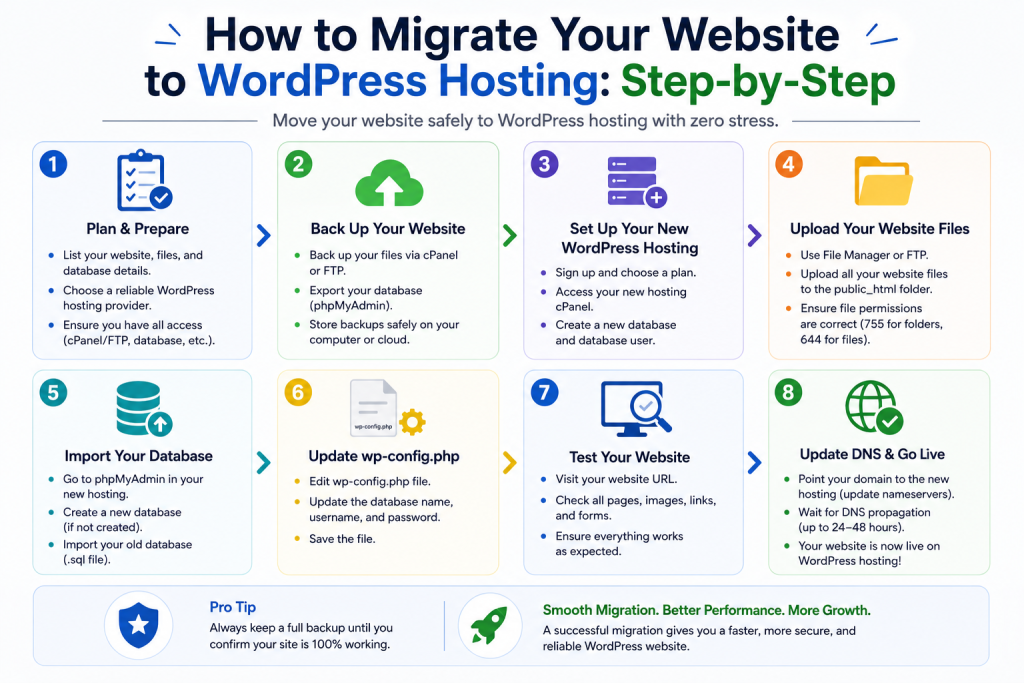
How to Migrate Your Website to WordPress Hosting: Step-by-Step
Step 1: Set Up the New WordPress Hosting Environment First
Don’t cancel or point your domain away from your old host yet. Set up WordPress on the new hosting account first, using a temporary URL or the server’s IP address to access it before the domain is switched.
Step 2: Transfer Your Files
Copy your entire WordPress installation — themes, plugins, uploads folder, and core files — to the new server. This is usually done via FTP/SFTP or a file manager provided by your host. Pay close attention to the wp-content folder, since this contains your themes, plugins, and media uploads.
Many hosting providers also offer automated migration tools or plugins that simplify this transfer process, moving files and the database in a single step. Even when using these tools, it’s still important to create a full backup and test the migrated site before updating DNS.
Once the transfer is complete, double-check folder permissions on wp-content, uploads, and other writable directories. Incorrect permissions are a common cause of upload errors, plugin failures, and broken media after migration.
Step 3: Export and Import the Database
Export your WordPress database as an SQL file from your current host (usually via phpMyAdmin), then import it into the new database on your destination server. After importing, update the wp-config.php file with the new database name, username, password, and host.
Step 4: Update the Site URL in the Database
If your new environment uses a different temporary URL, update the siteurl and home values in the wp_options table, or use a search-and-replace tool to update URLs throughout the database. This step prevents broken links and redirect loops.
Step 5: Test Before Switching DNS
Before pointing your domain to the new host, test the site thoroughly using a local hosts file edit or a temporary preview URL. Check:
- Homepage and internal pages load correctly
- Contact forms and checkout processes (if applicable) work
- Images and media display properly
- Admin login functions normally
If you’re migrating a WooCommerce store, consider enabling maintenance mode during the final sync to avoid losing new orders placed while the migration is in progress.
Step 6: Update DNS Records
Once testing confirms everything works, update your domain’s DNS records to point to the new WordPress hosting server. DNS changes can take a few hours to propagate fully, so avoid making further changes during this window.
Step 7: Install SSL and Force HTTPS
Set up an SSL certificate on the new hosting environment immediately after DNS propagates. Once active, confirm your site loads under HTTPS and update any hardcoded HTTP links in your content.
Step 8: Monitor for 24–48 Hours
Keep an eye on site performance, error logs, and uptime after the switch. Some visitors may briefly hit the old server during DNS propagation, so don’t decommission the old hosting account right away.
If unexpected issues occur after launch, restore your backup rather than attempting multiple fixes on the live site. A clean rollback is faster and safer than troubleshooting under pressure.
Common Migration Mistakes to Avoid
- Cancelling the old hosting plan too early. Keep it active for at least a week after migration in case you need to reference the old environment.
- Forgetting the uploads folder. Media files are often the largest part of a WordPress site and are easy to miss during manual transfers.
- Ignoring redirects for changed URLs. If any URL structures change during migration, missing 301 redirects will hurt both user experience and SEO.
- Migrating email and website at the same time. Handle these separately to reduce the chance of email downtime.
- Skipping the testing phase. Testing on a temporary URL before switching DNS catches most issues before they affect live visitors.
Post-Migration Best Practices
Once your site is live on the new WordPress hosting environment:
- Submit your sitemap again in Google Search Console to confirm indexing continues smoothly
- Set up automated backups on the new host if they aren’t already running
- Review your caching configuration, since caching plugins often need reconfiguring after a server change
- Confirm your firewall and security settings are active — this is especially important right after a migration, when configurations are still fresh
For businesses in the UAE managing eCommerce stores or client-facing sites, scheduling migrations during low-traffic hours (often late evening) helps minimize any visible disruption to visitors.