How to Secure Your WordPress Website (Step-by-Step Guide)
Introduction Learning how to secure your WordPress website is one of the most important responsibilities for any website owner. Whether you run a business website, blog, portfolio, or WooCommerce store, security should never be an afterthought. WordPress is regularly updated with security improvements, but most successful attacks happen because of weak passwords, outdated software, insecure […]
Introduction
Learning how to secure your WordPress website is one of the most important responsibilities for any website owner. Whether you run a business website, blog, portfolio, or WooCommerce store, security should never be an afterthought.
WordPress is regularly updated with security improvements, but most successful attacks happen because of weak passwords, outdated software, insecure plugins, or poor security practices—not because WordPress itself is insecure.
This guide walks you through the essential steps to improve your WordPress security, protect your login area, reduce brute-force attacks, and create a practical WordPress security checklist for ongoing maintenance.
Before You Start
Before making security changes:
- Create a full backup of your website.
- Ensure you have administrator access.
- Update WordPress, themes, and plugins.
- Test major changes on a staging site if available.
Starting with a backup ensures you can quickly restore your site if a configuration change causes unexpected issues.

Why WordPress Websites Get Hacked
Most compromised WordPress websites are affected by one or more of these issues:
- Weak or reused passwords
- Outdated plugins or themes
- Vulnerable third-party plugins
- Stolen login credentials
- Pirated or nulled themes and plugins
- Poor server-side security practices
Understanding these risks makes it easier to see why each security step in this guide matters.
Step 1: Keep WordPress Updated
One of the simplest ways to improve WordPress security best practices is to install updates promptly.
Always keep the following updated:
- WordPress core
- Themes
- Plugins
Updates frequently contain security patches that fix known vulnerabilities.
Step 2: Use Strong Login Credentials
Strong credentials are essential for a secure WordPress login.
Best practices include:
- Use long passwords with letters, numbers, and symbols.
- Avoid usernames like admin.
- Never reuse passwords across websites.
- Use a password manager if needed.
- Create unique passwords for every administrator account.
Step 3: Enable Two-Factor Authentication (2FA)
Two-factor authentication adds an extra layer of protection by requiring a second verification step, such as an authentication app or one-time code.
Even if an attacker obtains your password, they still cannot access your WordPress dashboard without the second factor.
Important
Recommended
Never rely on a single security measure. Combining strong passwords, regular updates, backups, and two-factor authentication provides much better protection than any one feature alone.
Step 4: Install a Trusted Security Plugin
A reputable WordPress security plugin can help automate tasks such as:
- Malware scanning
- Firewall protection
- Login protection
- File integrity monitoring
- Security alerts
Choose a plugin that is actively maintained and receives regular updates.
Step 5: Limit Login Attempts
By default, WordPress allows unlimited login attempts.
Limiting failed login attempts helps with WordPress brute-force protection by:
- Blocking repeated password guesses
- Reducing automated bot attacks
- Temporarily restricting suspicious IP addresses
Step 6: Use HTTPS with an SSL Certificate
An SSL certificate encrypts data exchanged between visitors and your website.
HTTPS protects:
- Login credentials
- Contact forms
- Customer information
- Payment-related sessions
Related guide: SSL for WordPress
Step 7: Use Trusted Themes and Plugins
Before installing any plugin or theme, check:
- Update frequency
- User reviews
- Compatibility
- Developer reputation
Avoid pirated or nulled software, which often contains hidden malware or backdoors.
Step 8: Remove Unused Plugins and Themes
Inactive software can still contain vulnerabilities.
Regularly:
- Delete unused plugins.
- Remove inactive themes you no longer need.
- Keep only one default WordPress theme as a fallback.
Step 9: Back Up Your Website Regularly
A strong WordPress backup strategy includes:
- Automatic scheduled backups
- Off-site storage
- Regular restoration tests
- Daily backups for active websites
Related guide: WordPress Backup Best Practices
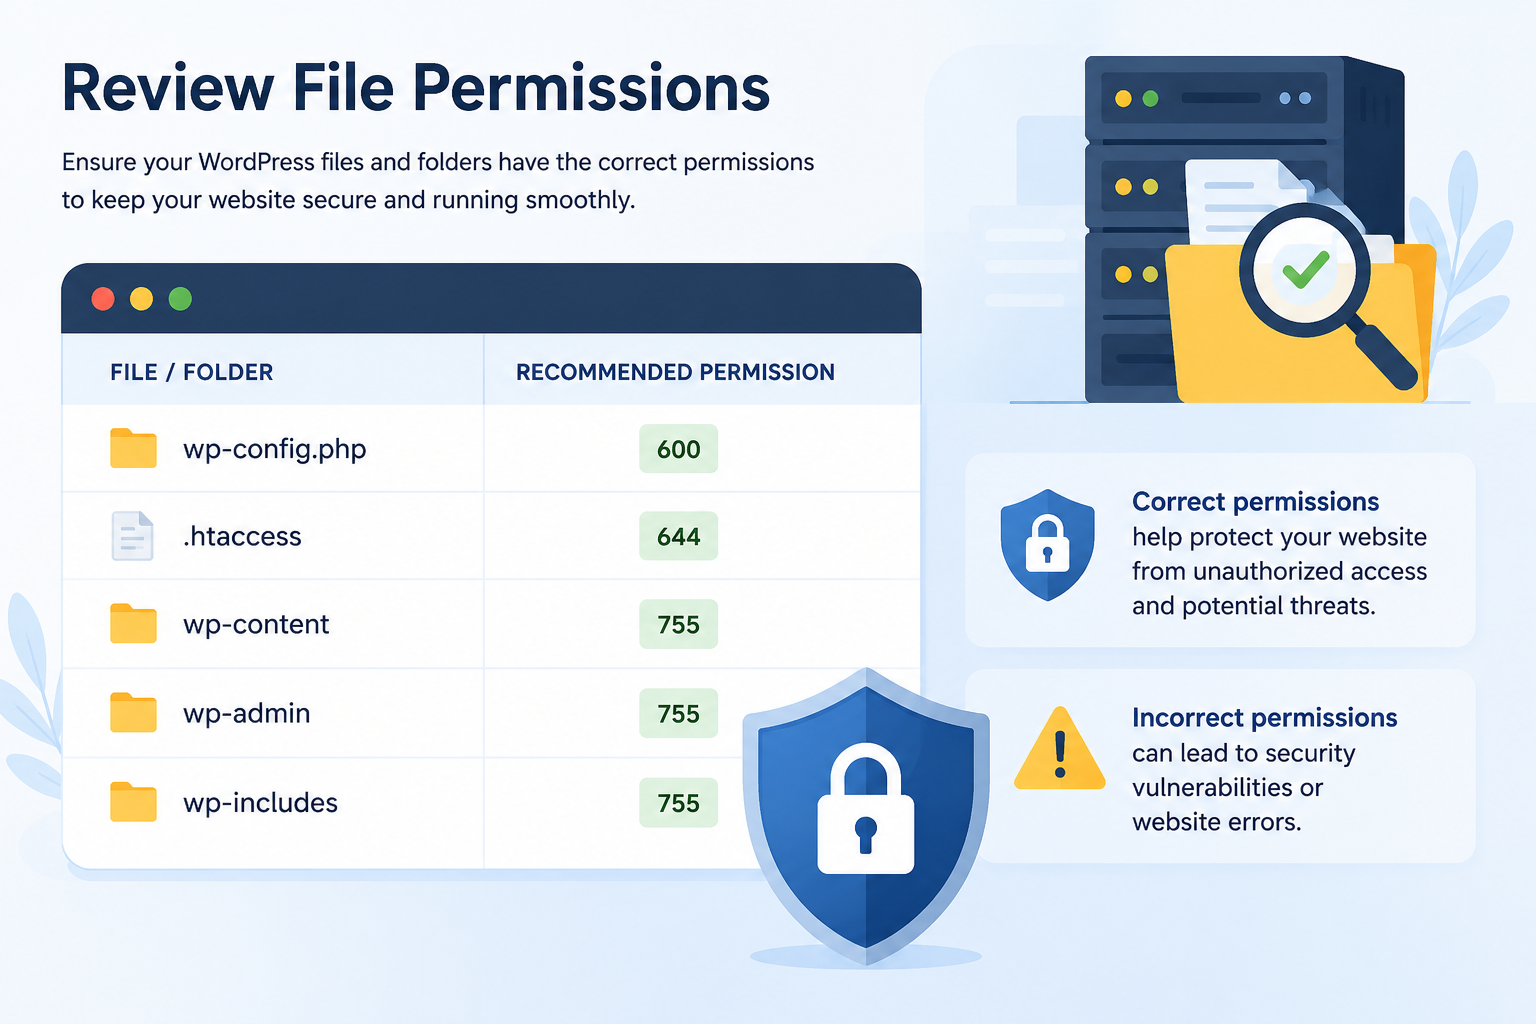
Step 10: Review File Permissions
Incorrect file permissions can expose sensitive files.
Most WordPress installations work well with:
Item | Recommended Permission |
Directories | 755 |
Files | 644 |
Avoid setting permissions to 777 unless absolutely necessary.
Step 11: Use Secure User Permissions
Assign users only the access they need.
Common roles:
- Administrator
- Editor
- Author
- Contributor
- Subscriber
Review user accounts periodically and remove inactive users.
Step 12: Protect the Login Page
Additional protection measures include:
- Enabling CAPTCHA
- Limiting login attempts
- Blocking malicious IP addresses
- Using a WordPress firewall or Web Application Firewall (WAF)
Changing the default login URL can reduce automated login attempts, but it should be used alongside stronger protections such as two-factor authentication and limited login attempts—not as a replacement.
Step 13: Disable Unnecessary XML-RPC Access
If your website does not rely on XML-RPC for remote publishing or integrations, consider disabling it to reduce unnecessary attack vectors.
This can help limit certain types of automated login and abuse attempts.
Step 14: Enable Basic Security Headers
Security headers provide additional browser-level protection.
Useful headers include:
- HSTS
- X-Frame-Options
- X-Content-Type-Options
Many managed WordPress hosting providers or security plugins can help configure these headers.
Step 15: Automatically Log Out Inactive Users
For multi-user websites, configure automatic logout for inactive sessions.
This reduces the risk of unauthorized access if a user leaves their dashboard open on a shared or unattended device.
Step 16: Scan for Malware Regularly
Regular WordPress malware protection scans can identify:
- Suspicious files
- Modified core files
- Malicious scripts
- SEO spam injections
- Backdoors
Step 17: Secure Your Hosting Environment
Your hosting environment plays an important role in website security.
Look for features such as:
- Server-level firewalls that block malicious traffic before it reaches WordPress
- Malware scanning to detect compromised files early
- Account isolation to prevent issues on neighboring websites from affecting your site
- Automatic security updates that reduce exposure to known vulnerabilities
- DDoS protection and secure server configurations
Related guide: Managed WordPress Hosting
Make Security Part of Routine Maintenance
WordPress security is not a one-time task.
Set aside time each month to:
- Install updates
- Review user accounts
- Check backup status
- Scan for malware
- Remove unused plugins
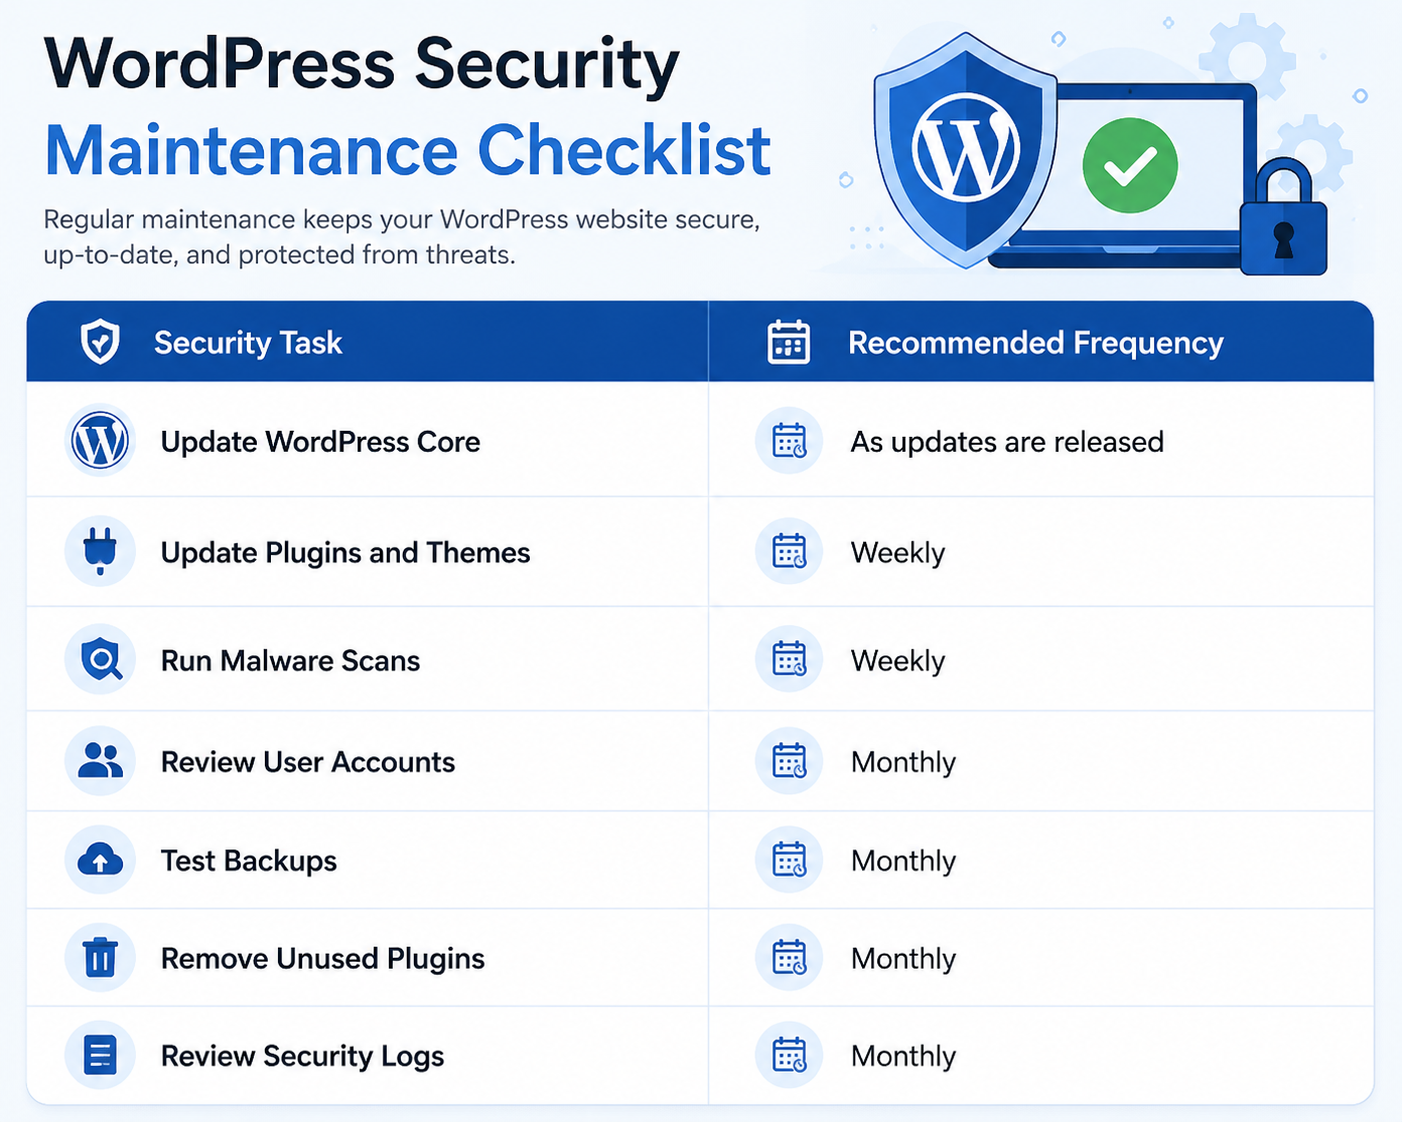
WordPress Security Maintenance Checklist
Security Task | Recommended Frequency |
Update WordPress Core | As updates are released |
Update Plugins and Themes | Weekly |
Run Malware Scans | Weekly |
Review User Accounts | Monthly |
Test Backups | Monthly |
Remove Unused Plugins | Monthly |
Review Security Logs | Monthly |
Common WordPress Security Mistakes
- Ignoring software updates
- Using weak passwords
- Installing pirated plugins
- Keeping unused plugins installed
- Giving everyone administrator access
- Skipping regular backups
- Not using HTTPS
- Ignoring security warnings